Adding a frontend
Learn how to deploy a frontend to CYF’s hosted environment
Creating a frontend
Click “Add New Resource”

Add the GitHub repository
The hosting platform needs to know where to get your backend from.
You probably want to add a “Public Repository” Git Based repository, to tell it your project is in GitHub.
If you want your application to auto-deploy when you push changes to it, you’ll need to instead choose “Private Repository (with GitHub App)” and set up a GitHub App yourself.
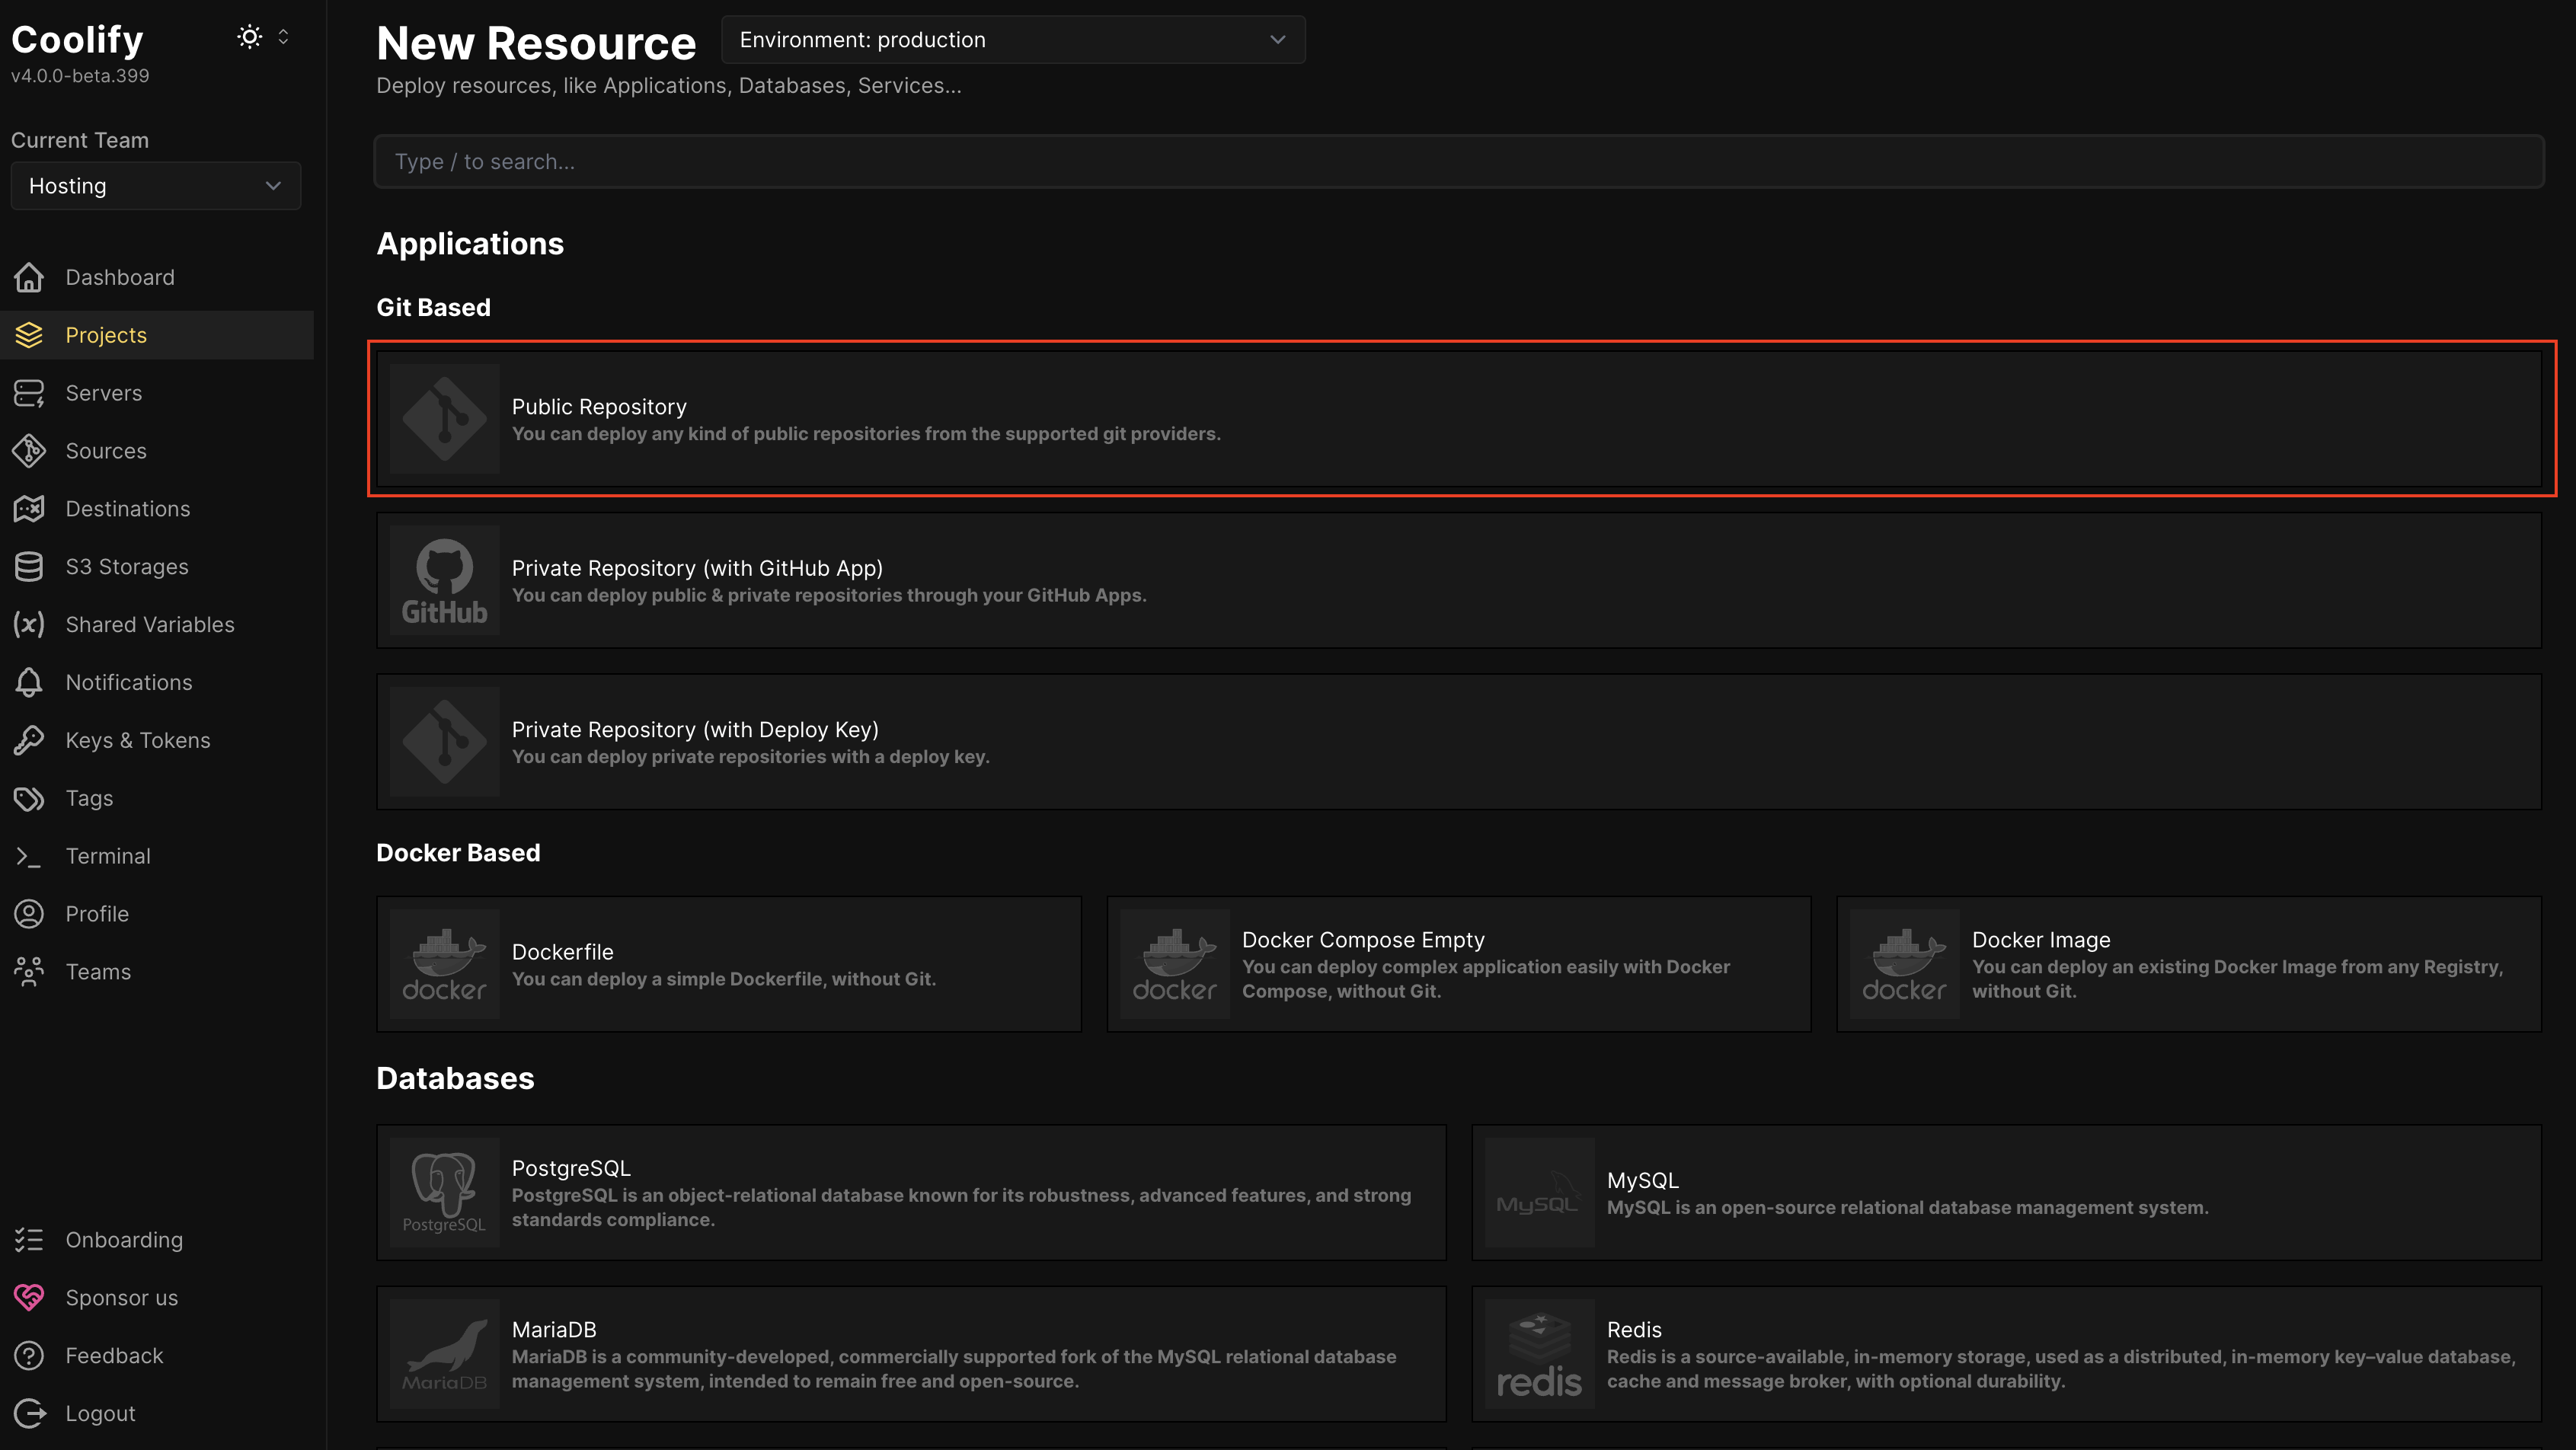
Open your GitHub in another tab, and copy the HTTPS Clone URL
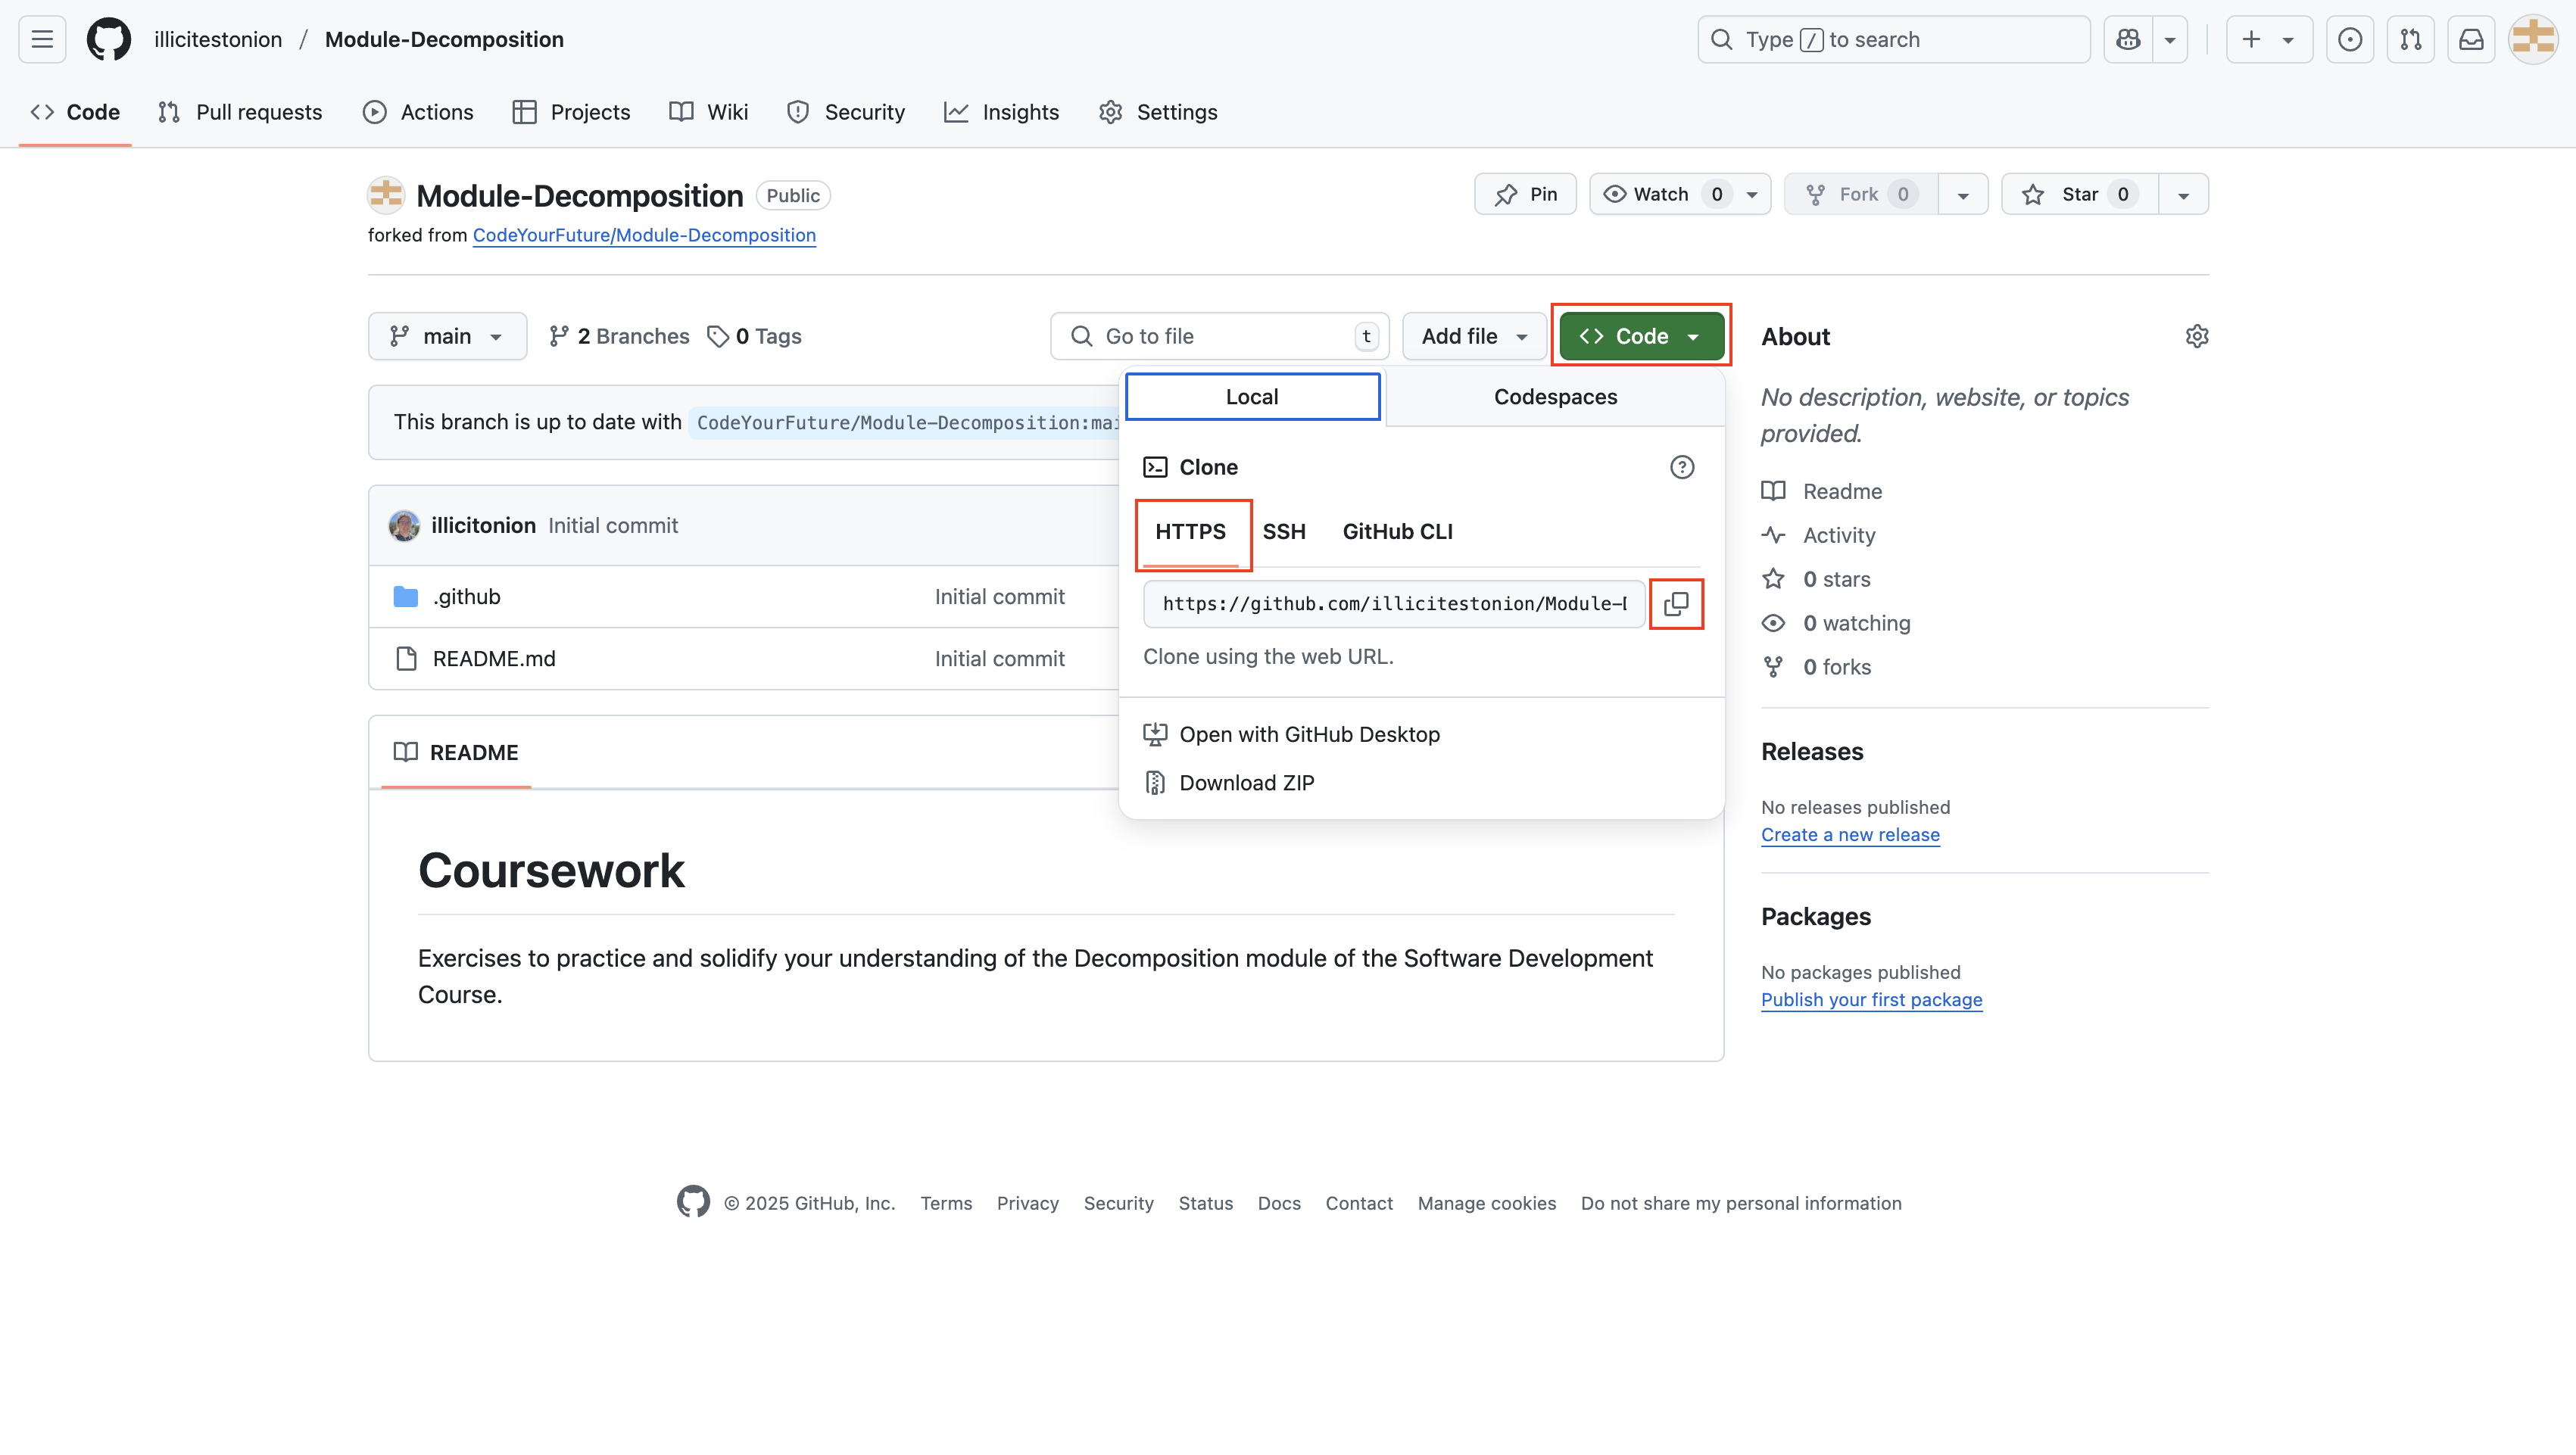
Go back to the CYF Hosting and paste the URL into the “Repository URL” field
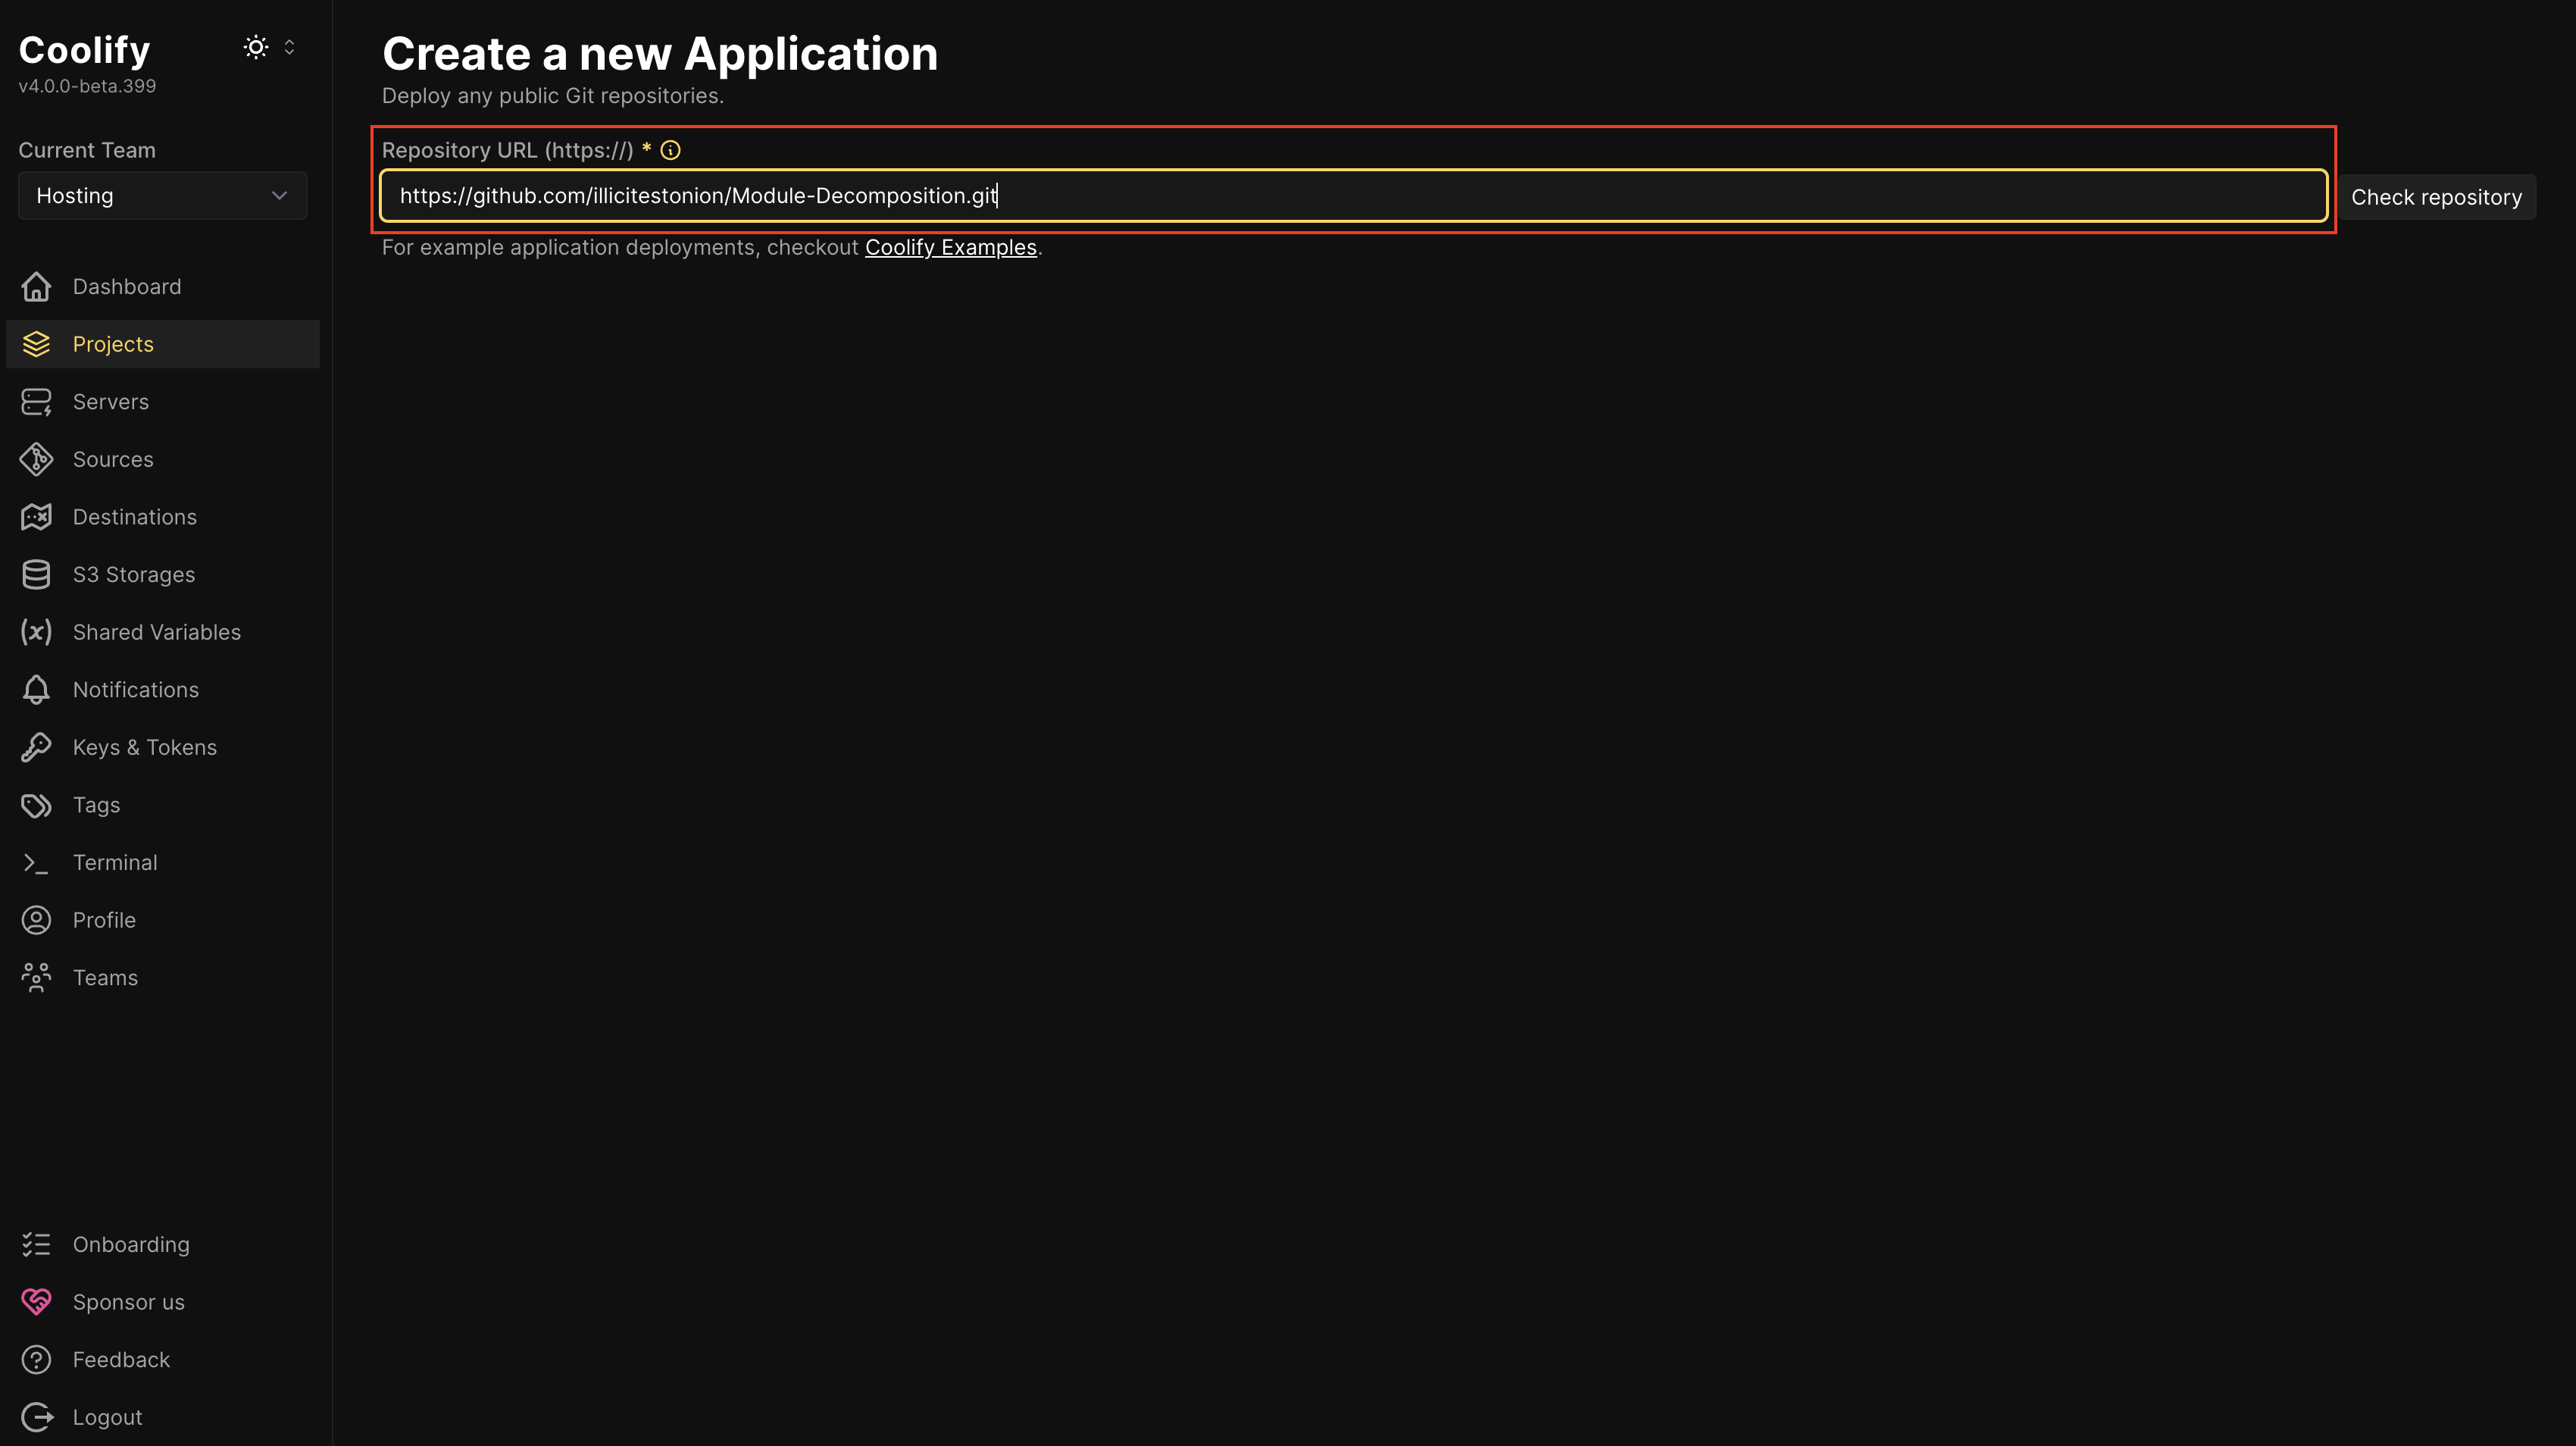
Click “Check repository”.
Click It is a static site?.
Press Continue.
Configuring the frontend
Most things should Just Work.
There are some things you may want or need to configure. If you do change any, you need to press the Enter key to save the change.
If your frontend is located in a subdirectory of the repo, you should set the Base Directory.
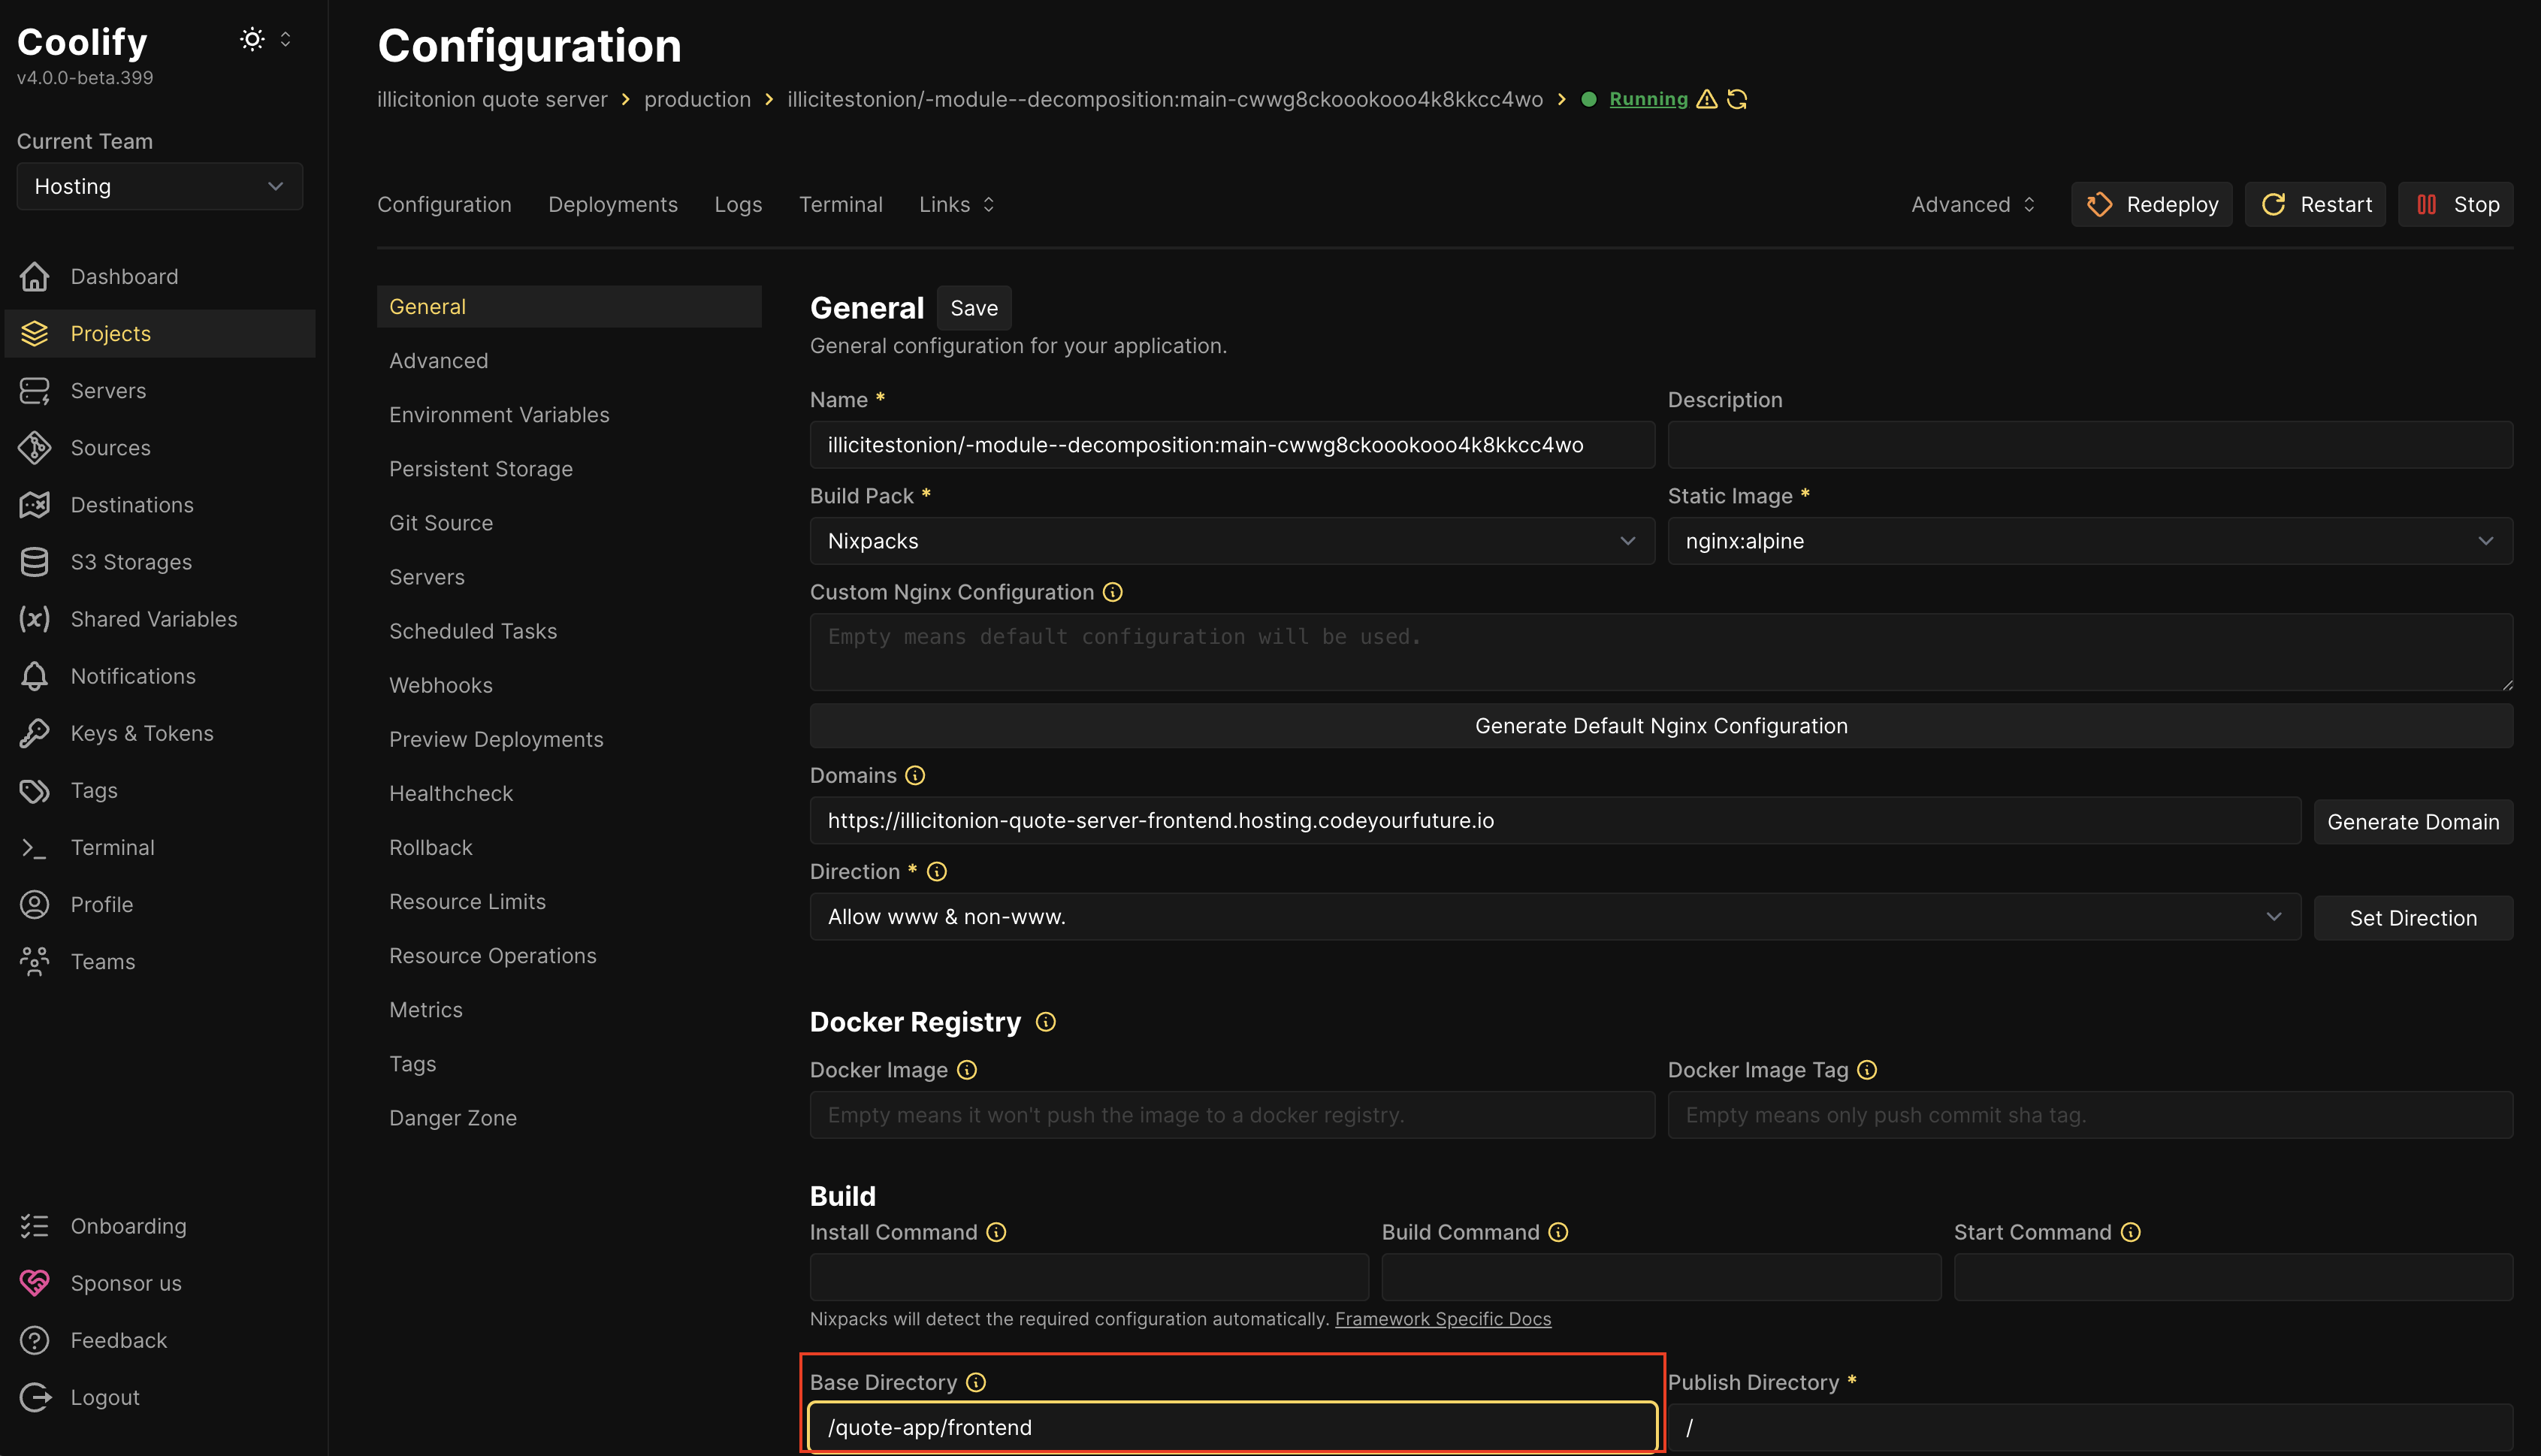
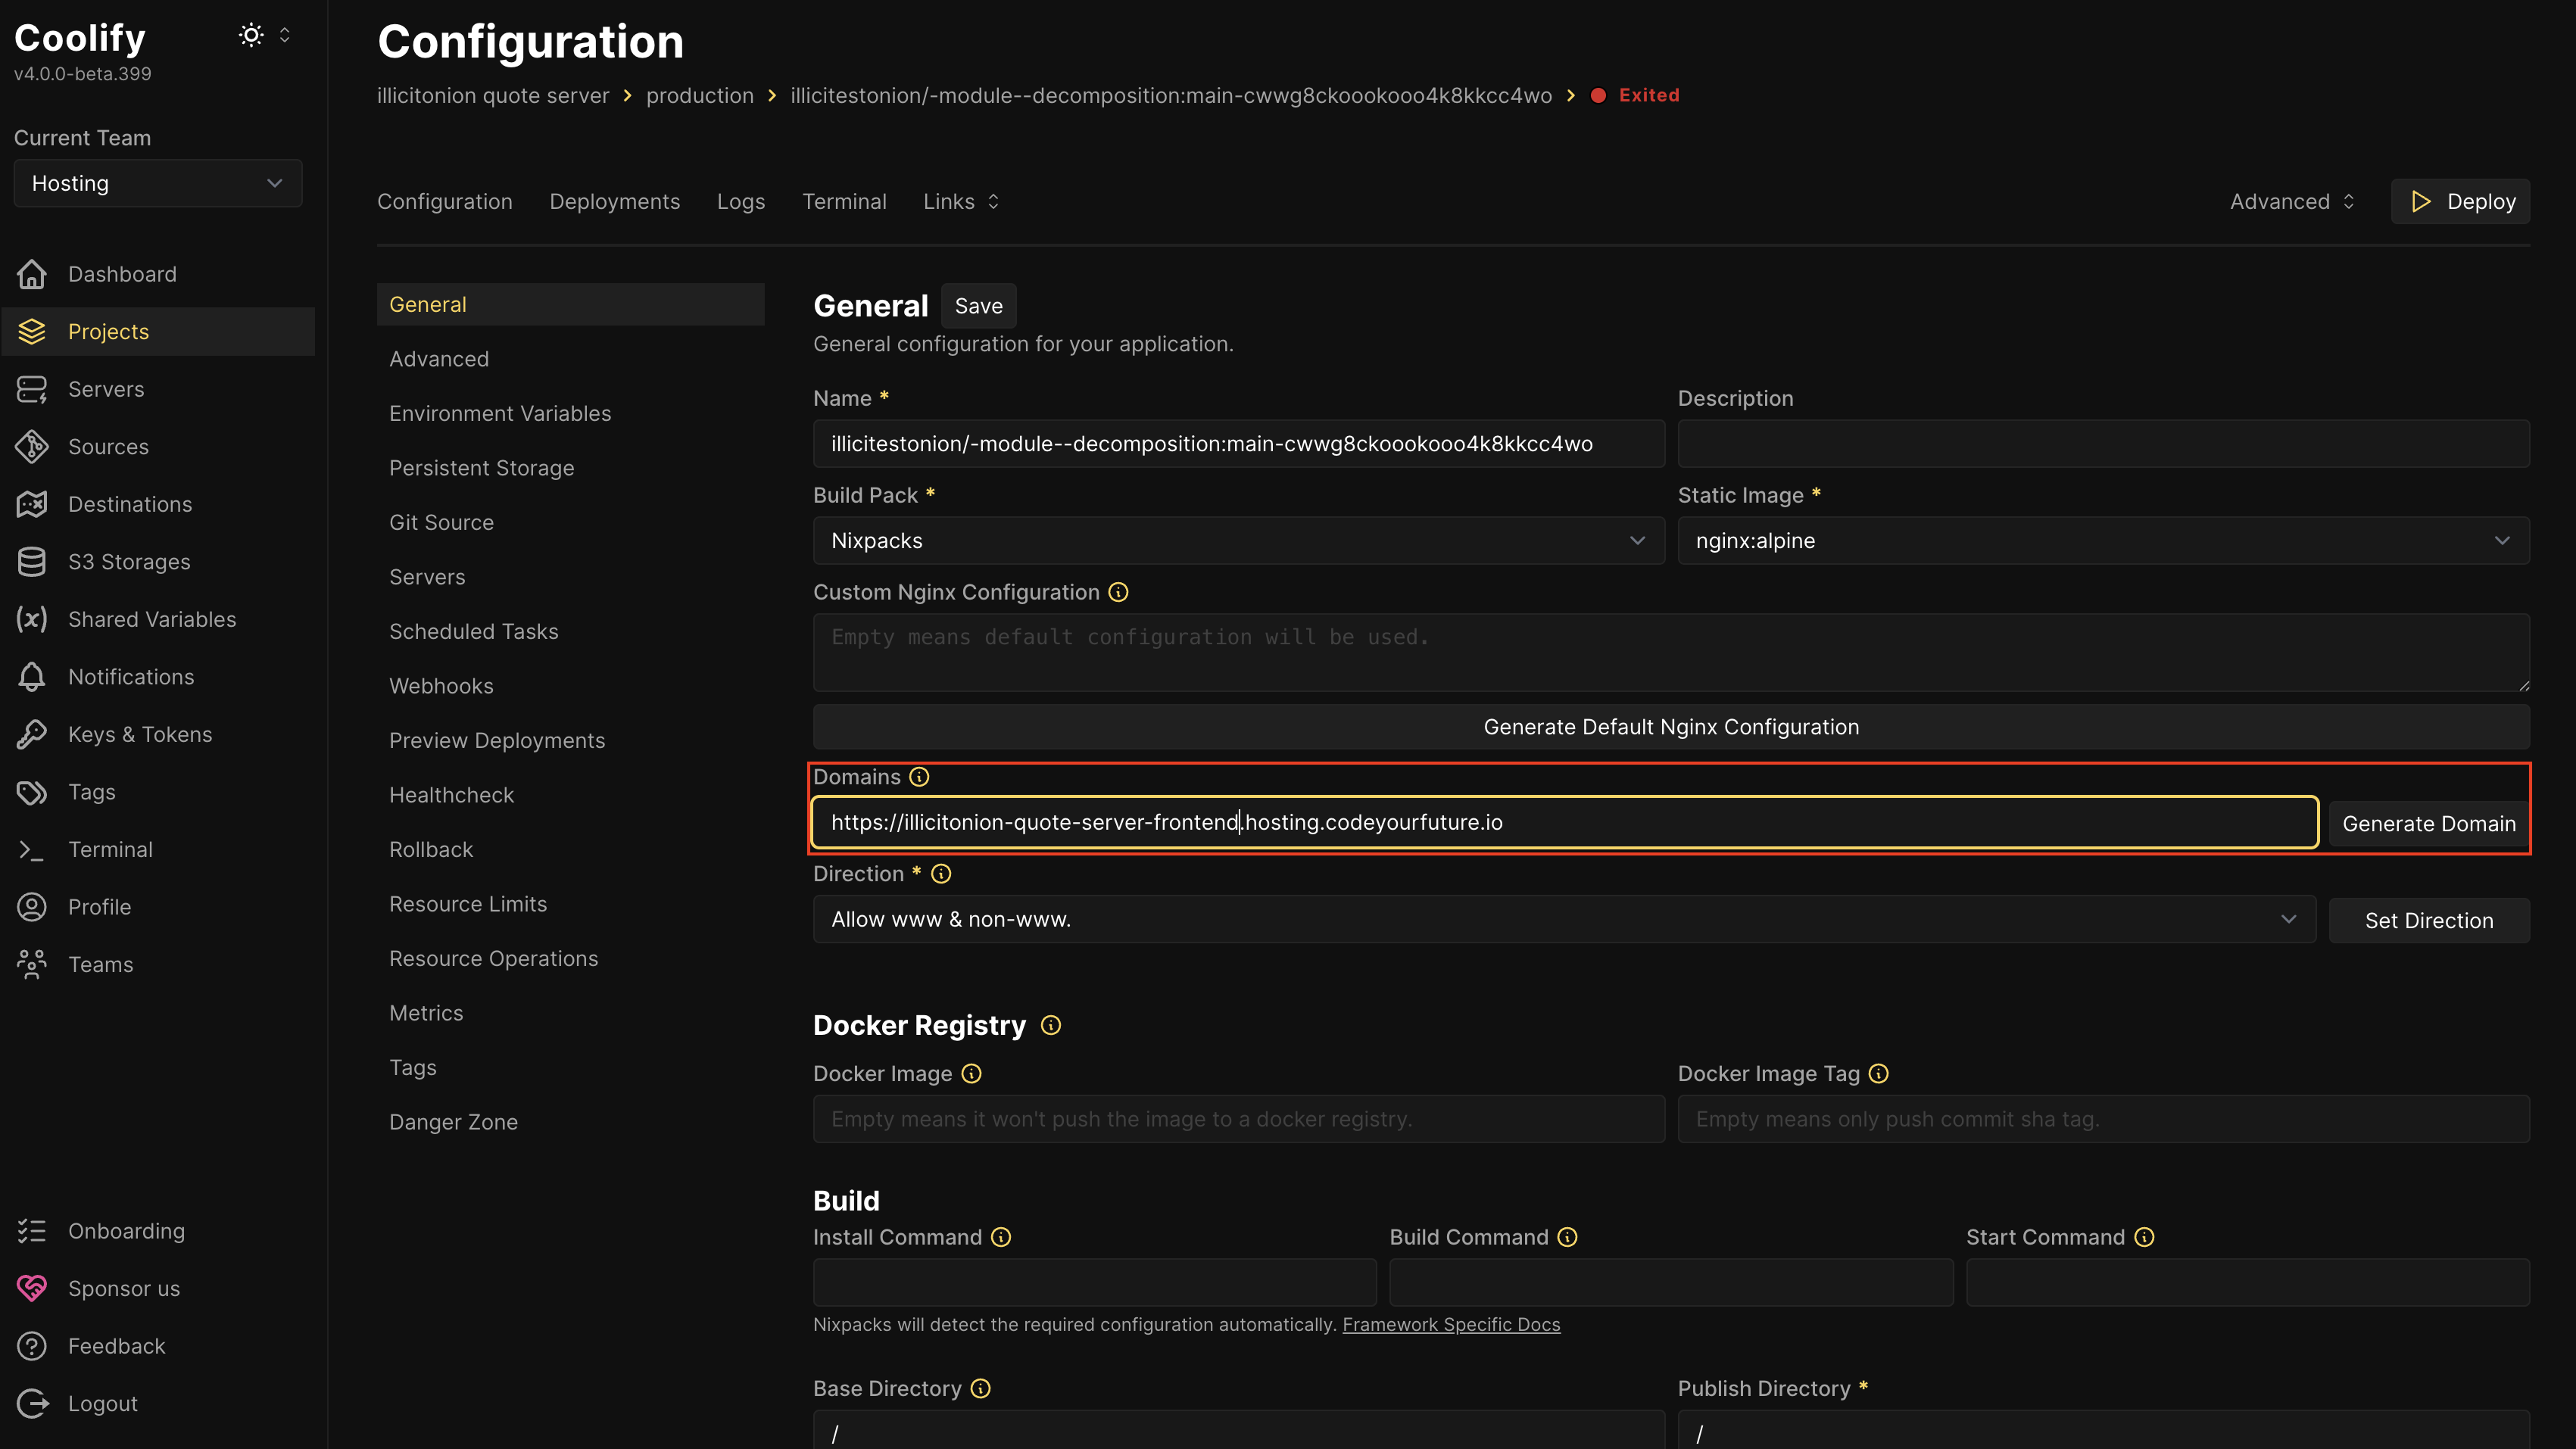
You may want to choose a friendly/memorable Domain:
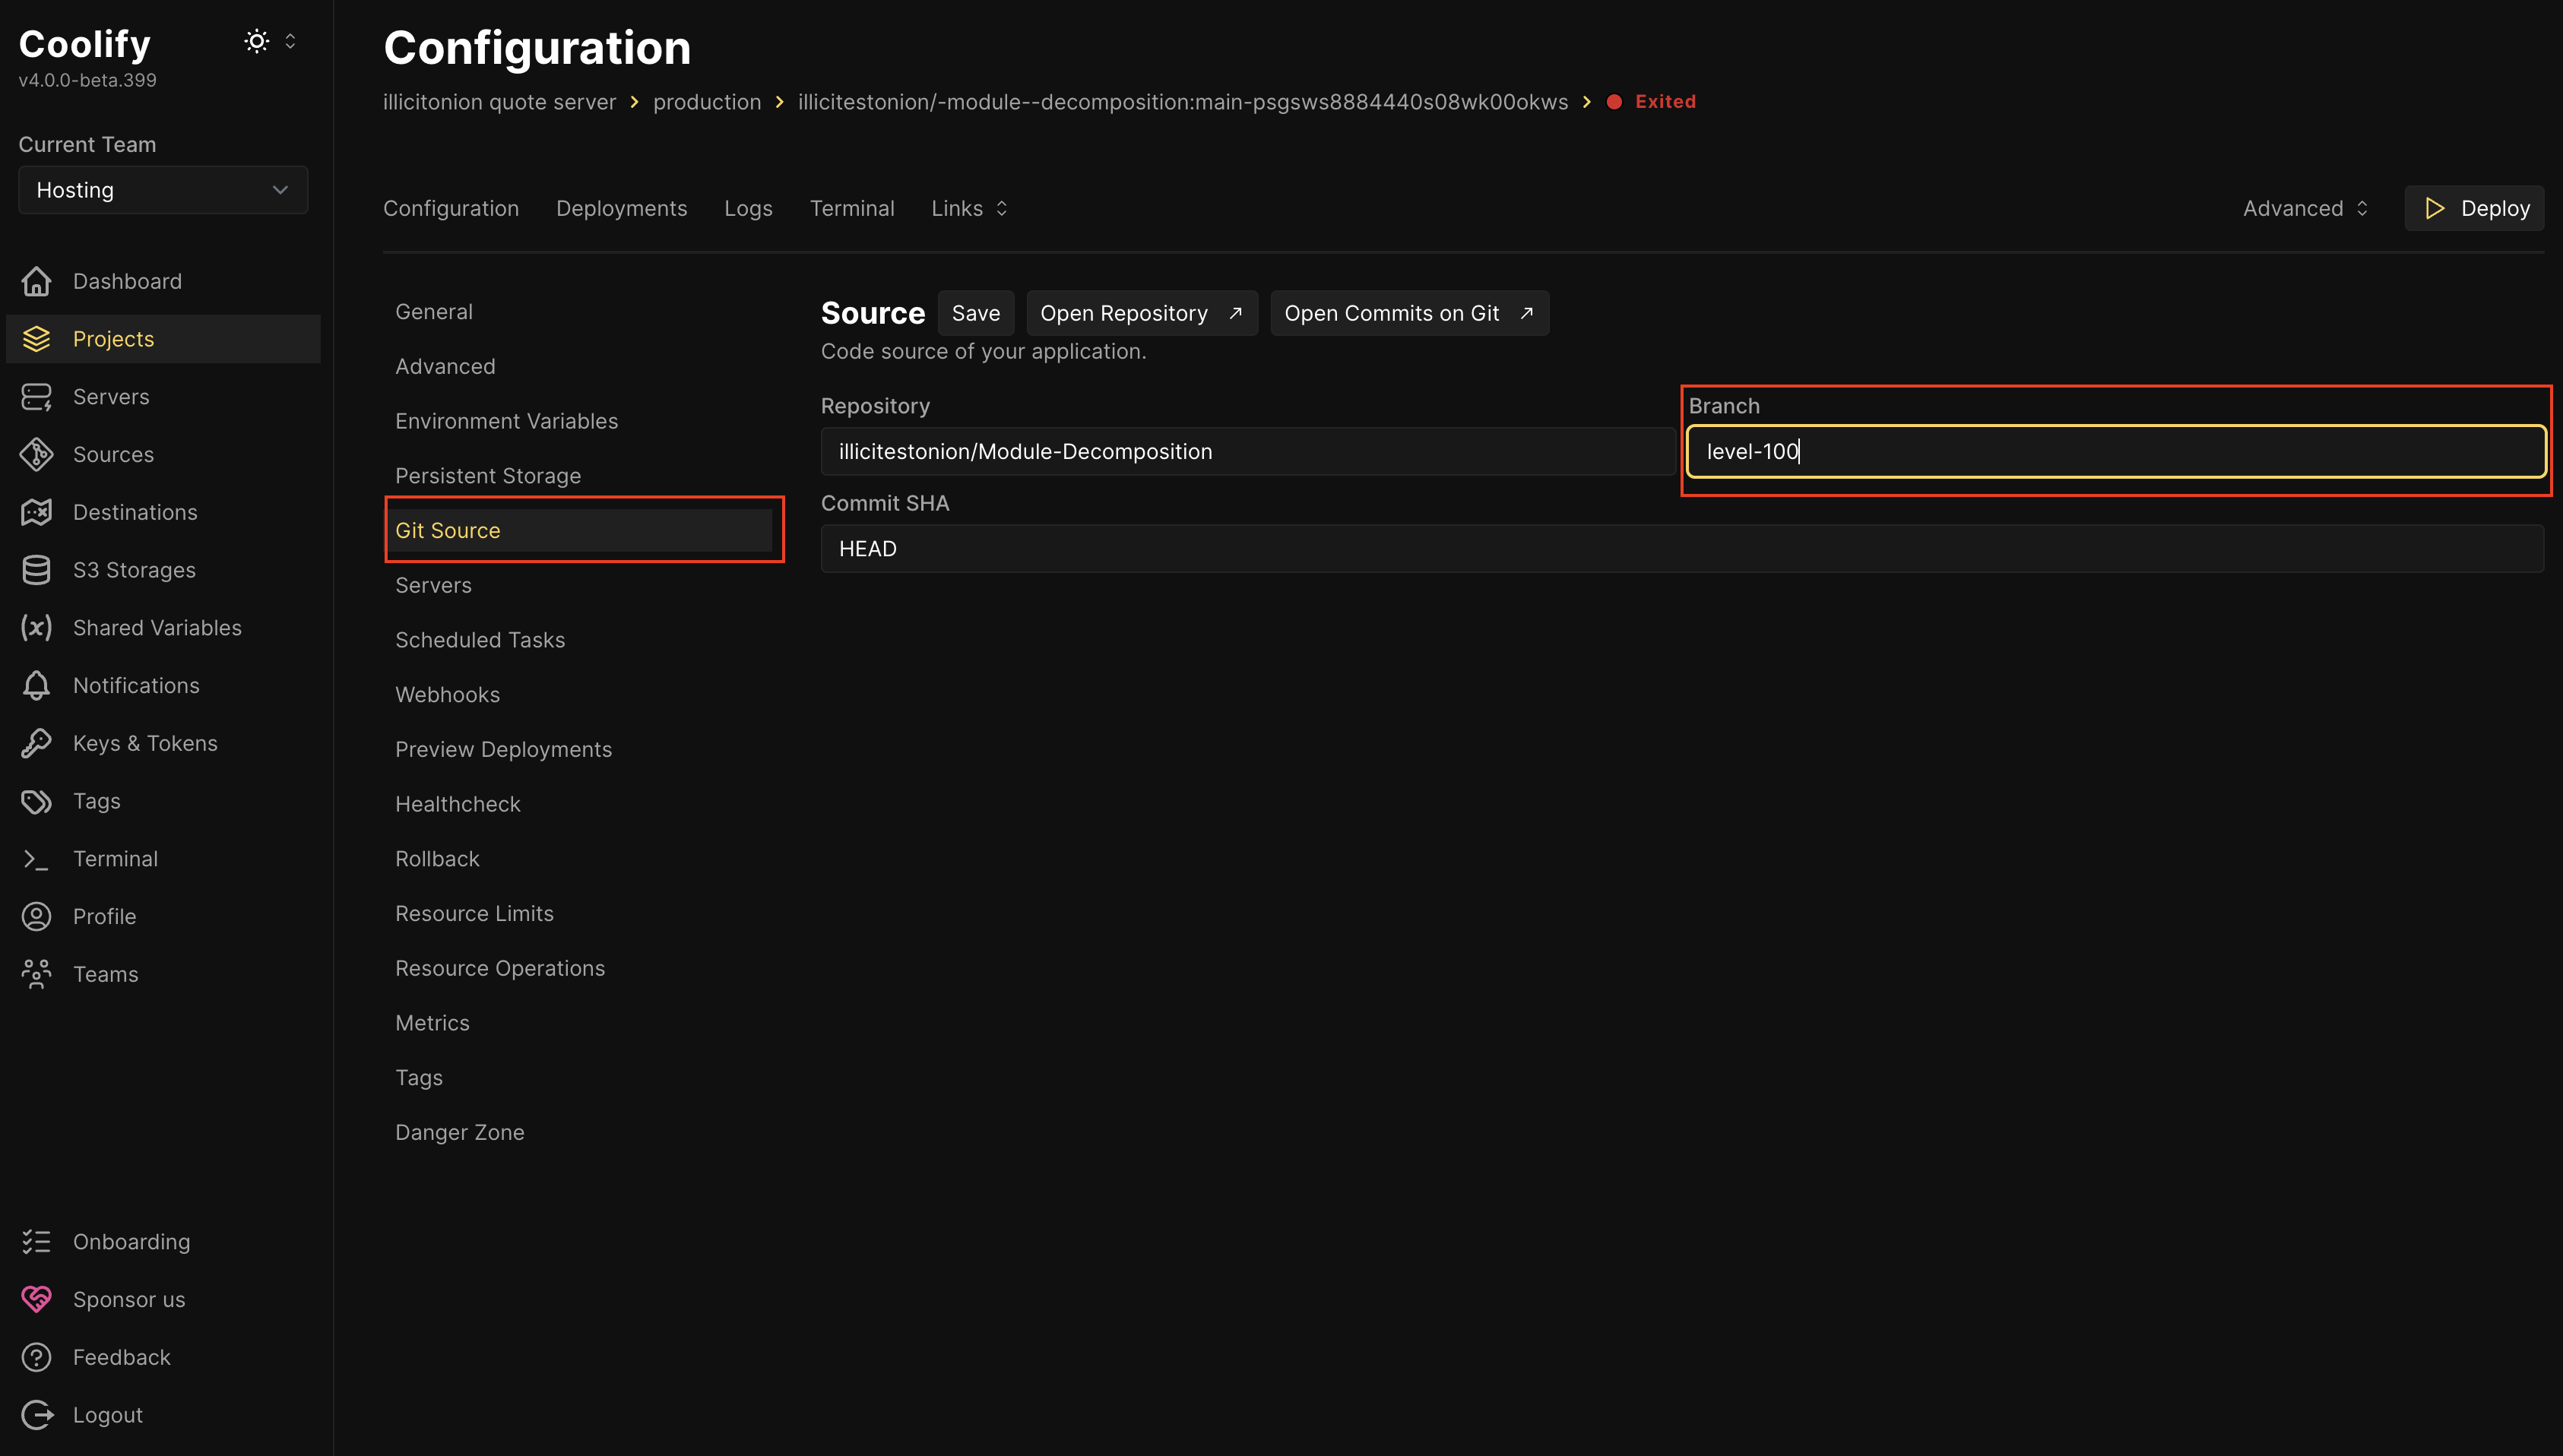
If you want to deploy from a branch that isn’t main, you need to configure this in the Git Source tab:
Add NODE_ENV to Your Project
Required for: All Node.js projects (anything that has a package.json file)
Steps
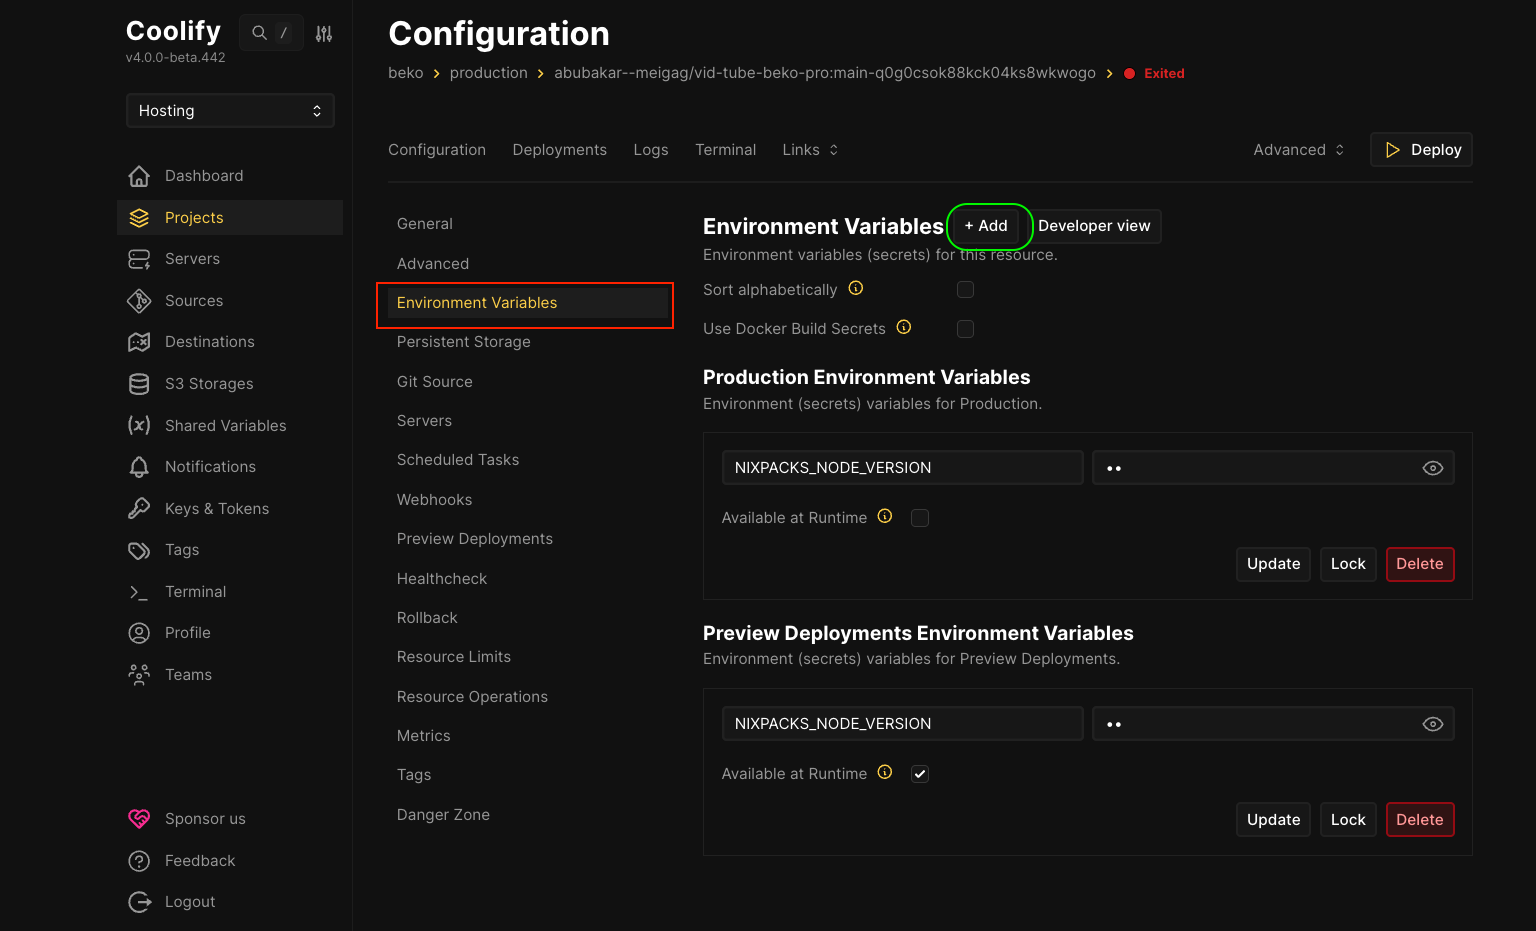
- Click on “Environment Variables” in the left sidebar
- Click the "+ Add" button
- Fill in the form:
- Name:
NODE_ENV - Value:
{{team.NODE_ENV}} - Make sure “Available at Build time” is not checked ❌
- Make sure “Available at Runtime” is checked ✅
- Name:
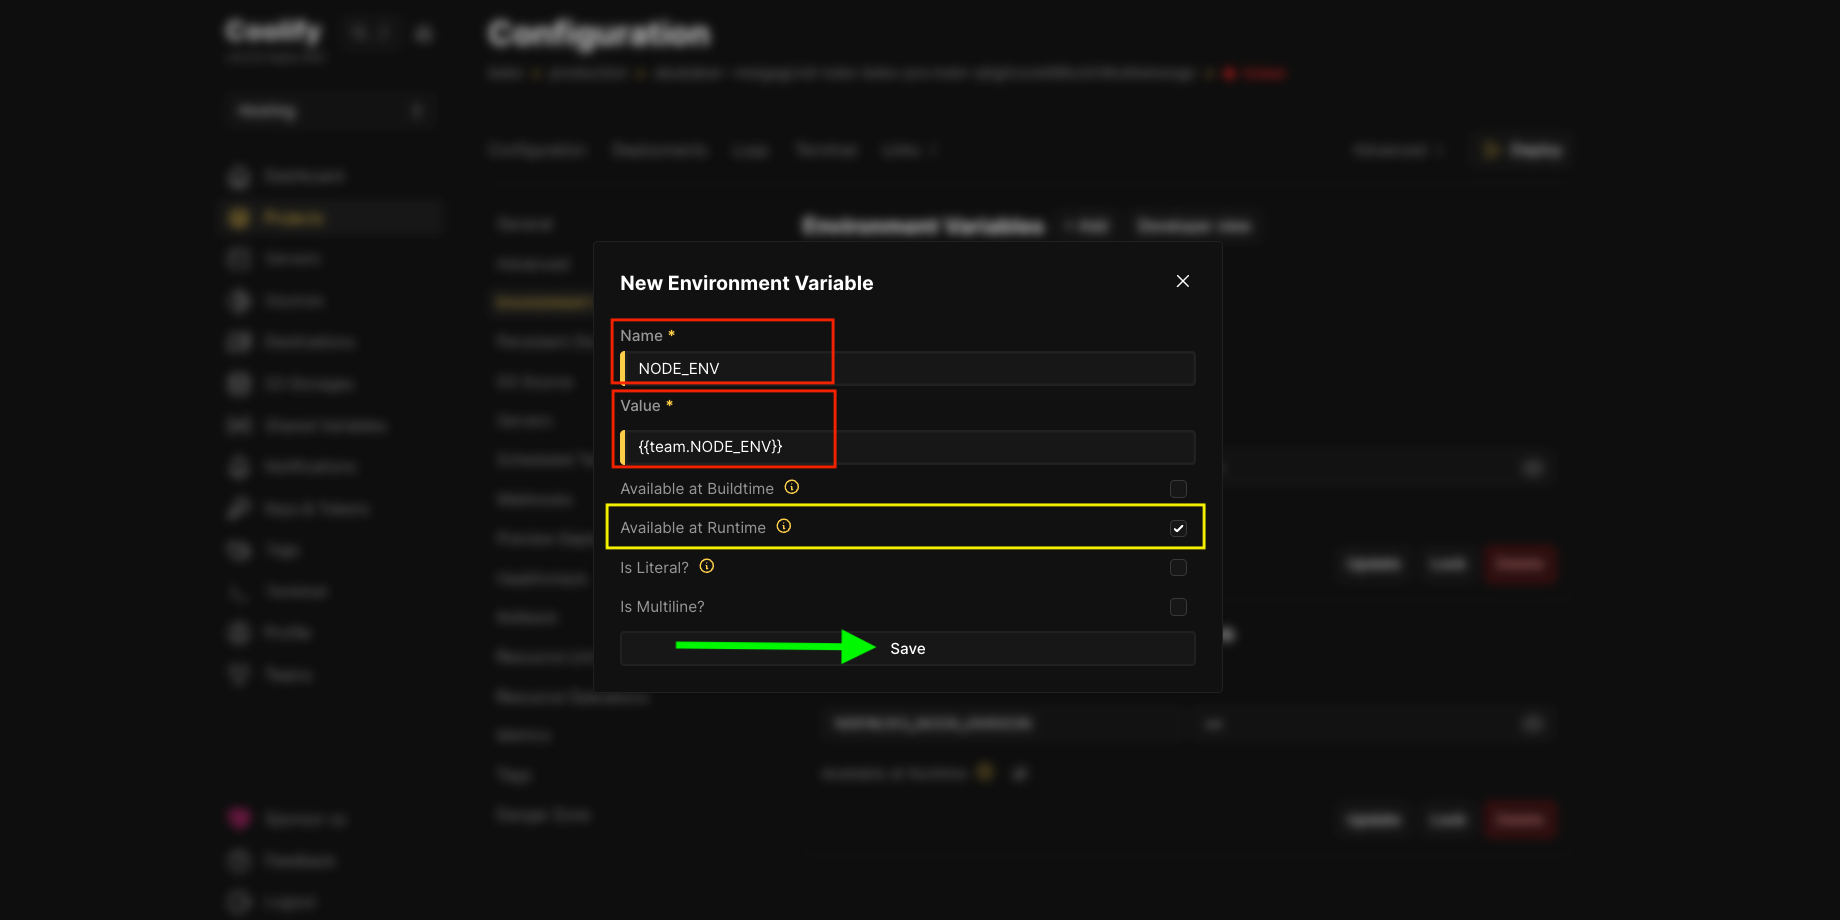
- Click “Save”
Deploying the frontend
When everything is configured correctly, press the Deploy button:

Watch the logs. Fix anything that goes wrong. When the deploy is finished, you can test out your frontend.
Fix MIME types
If your frontend uses .mjs files, you need to customise the Nginx configuration so that these are served with the correct MIME type.
Do this by:
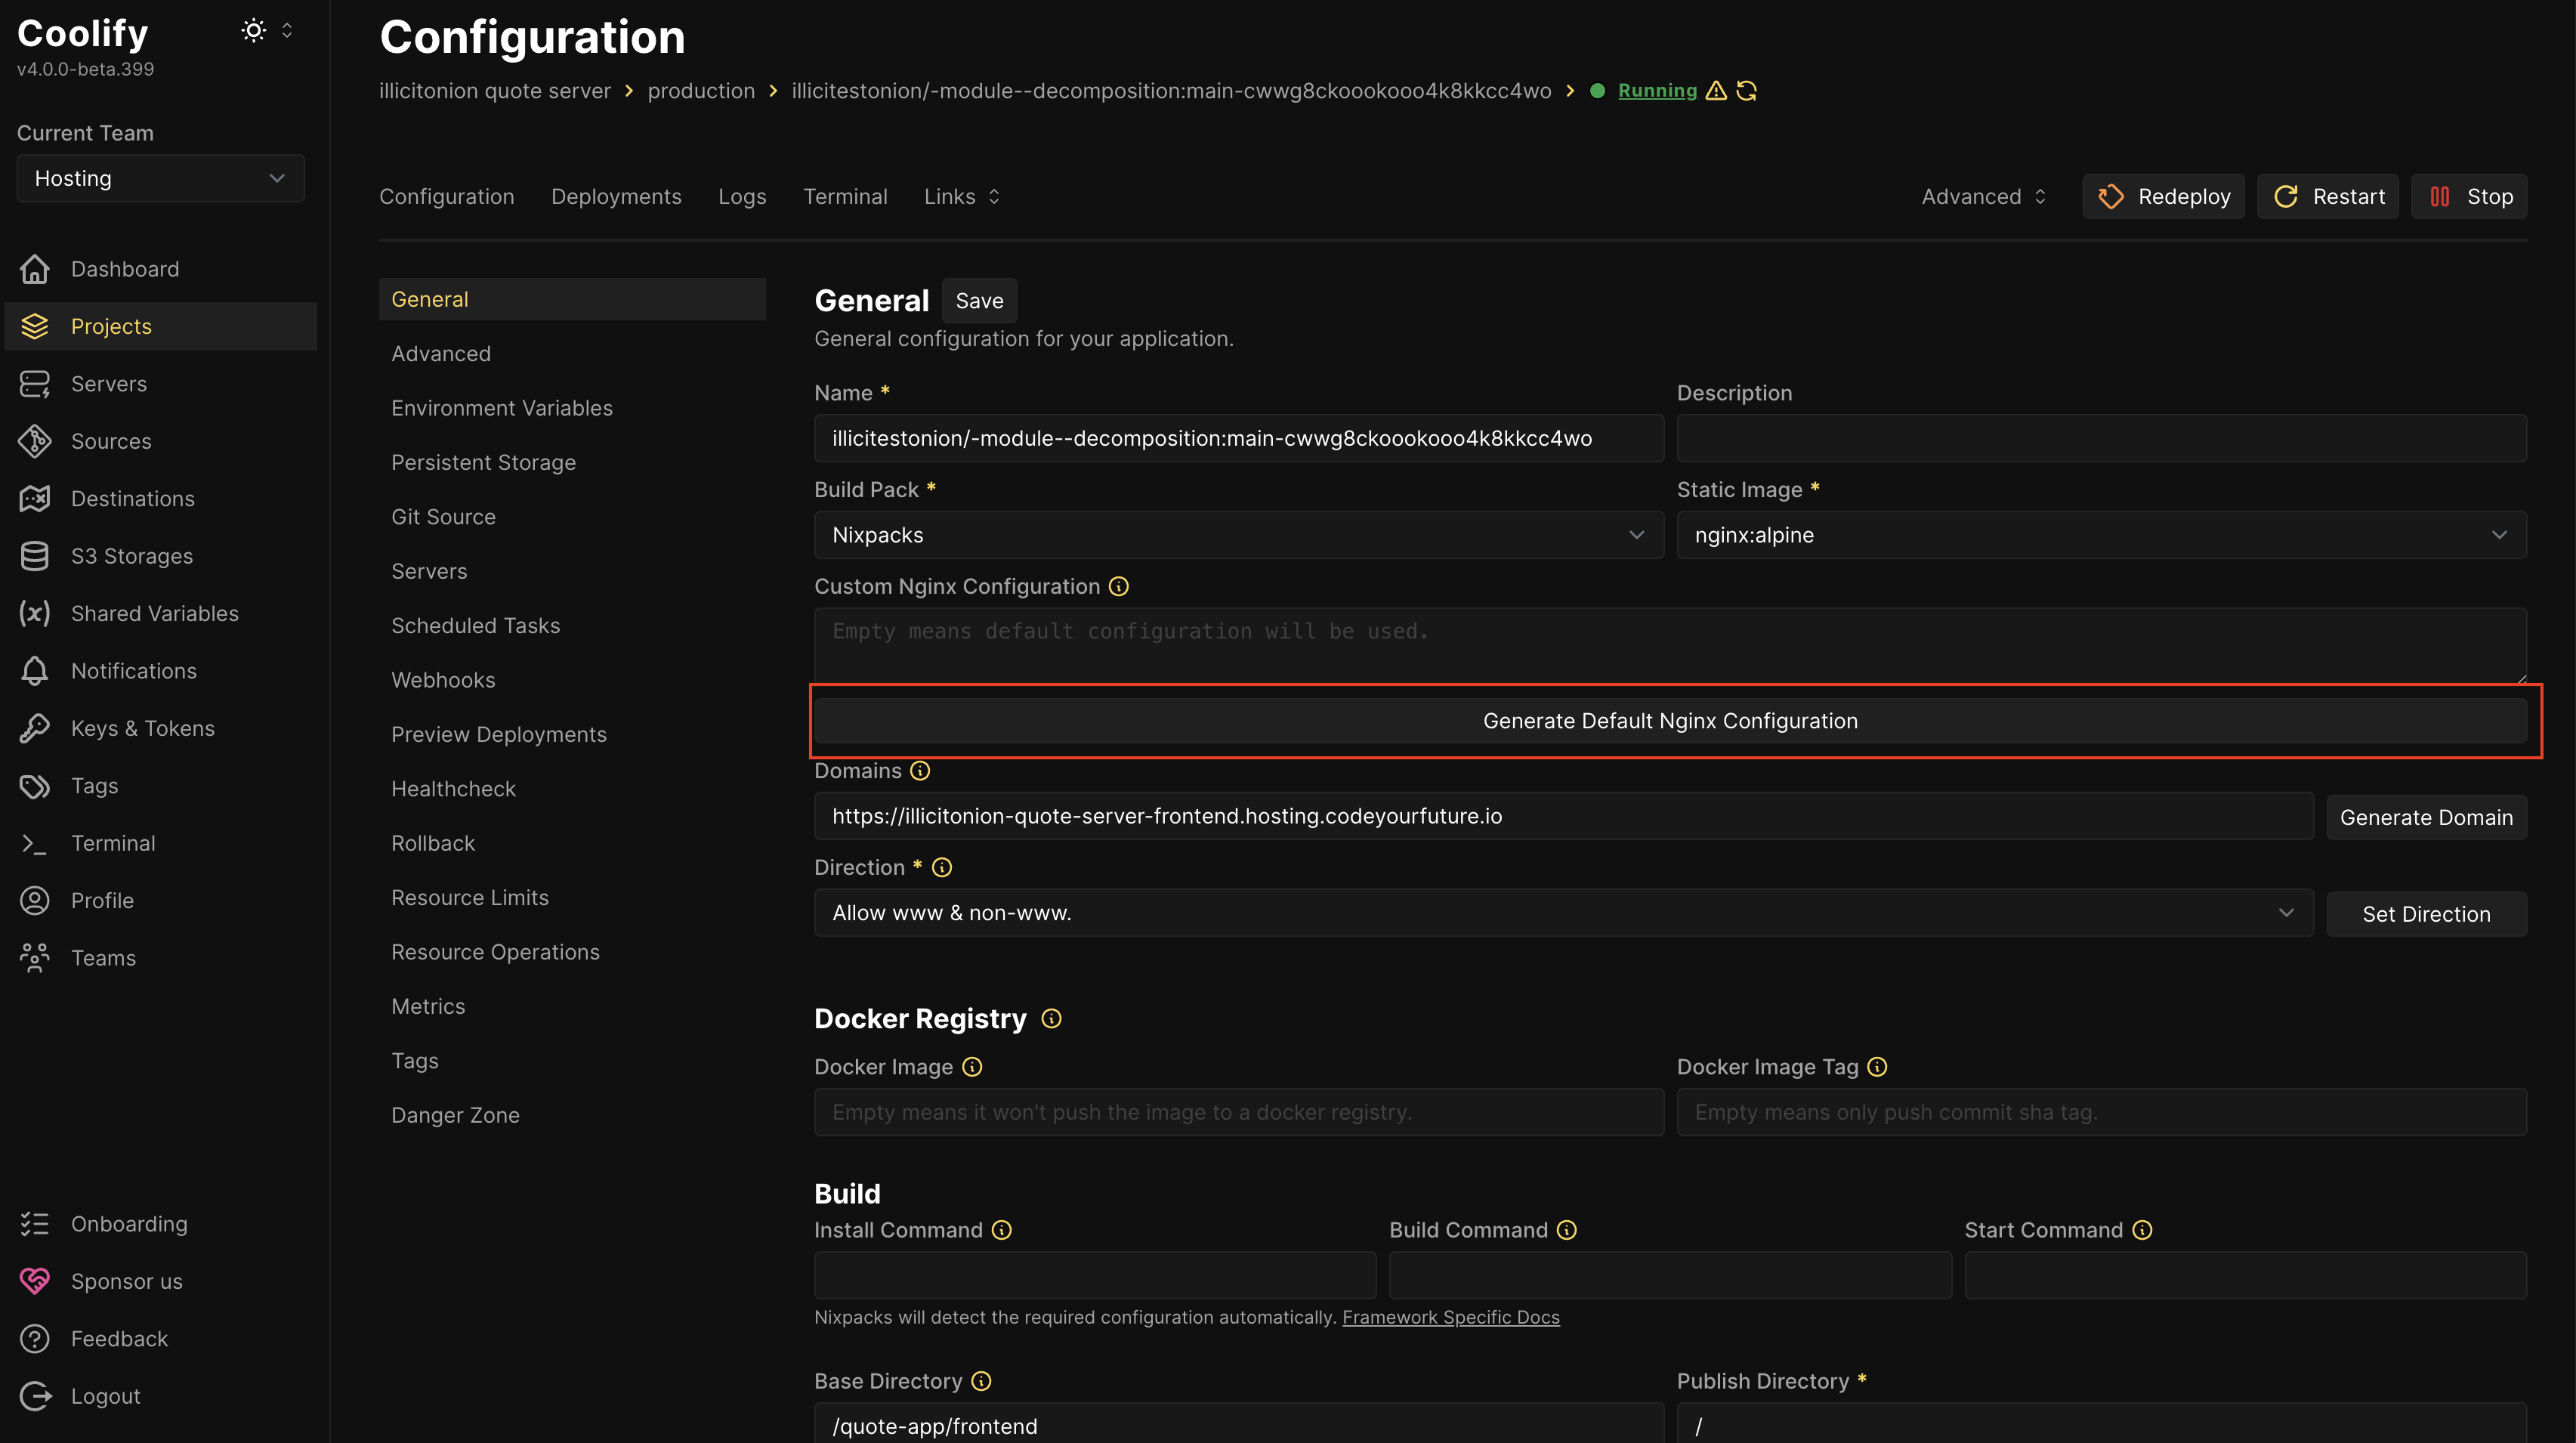
Pressing Generate Default Nginx Configuration
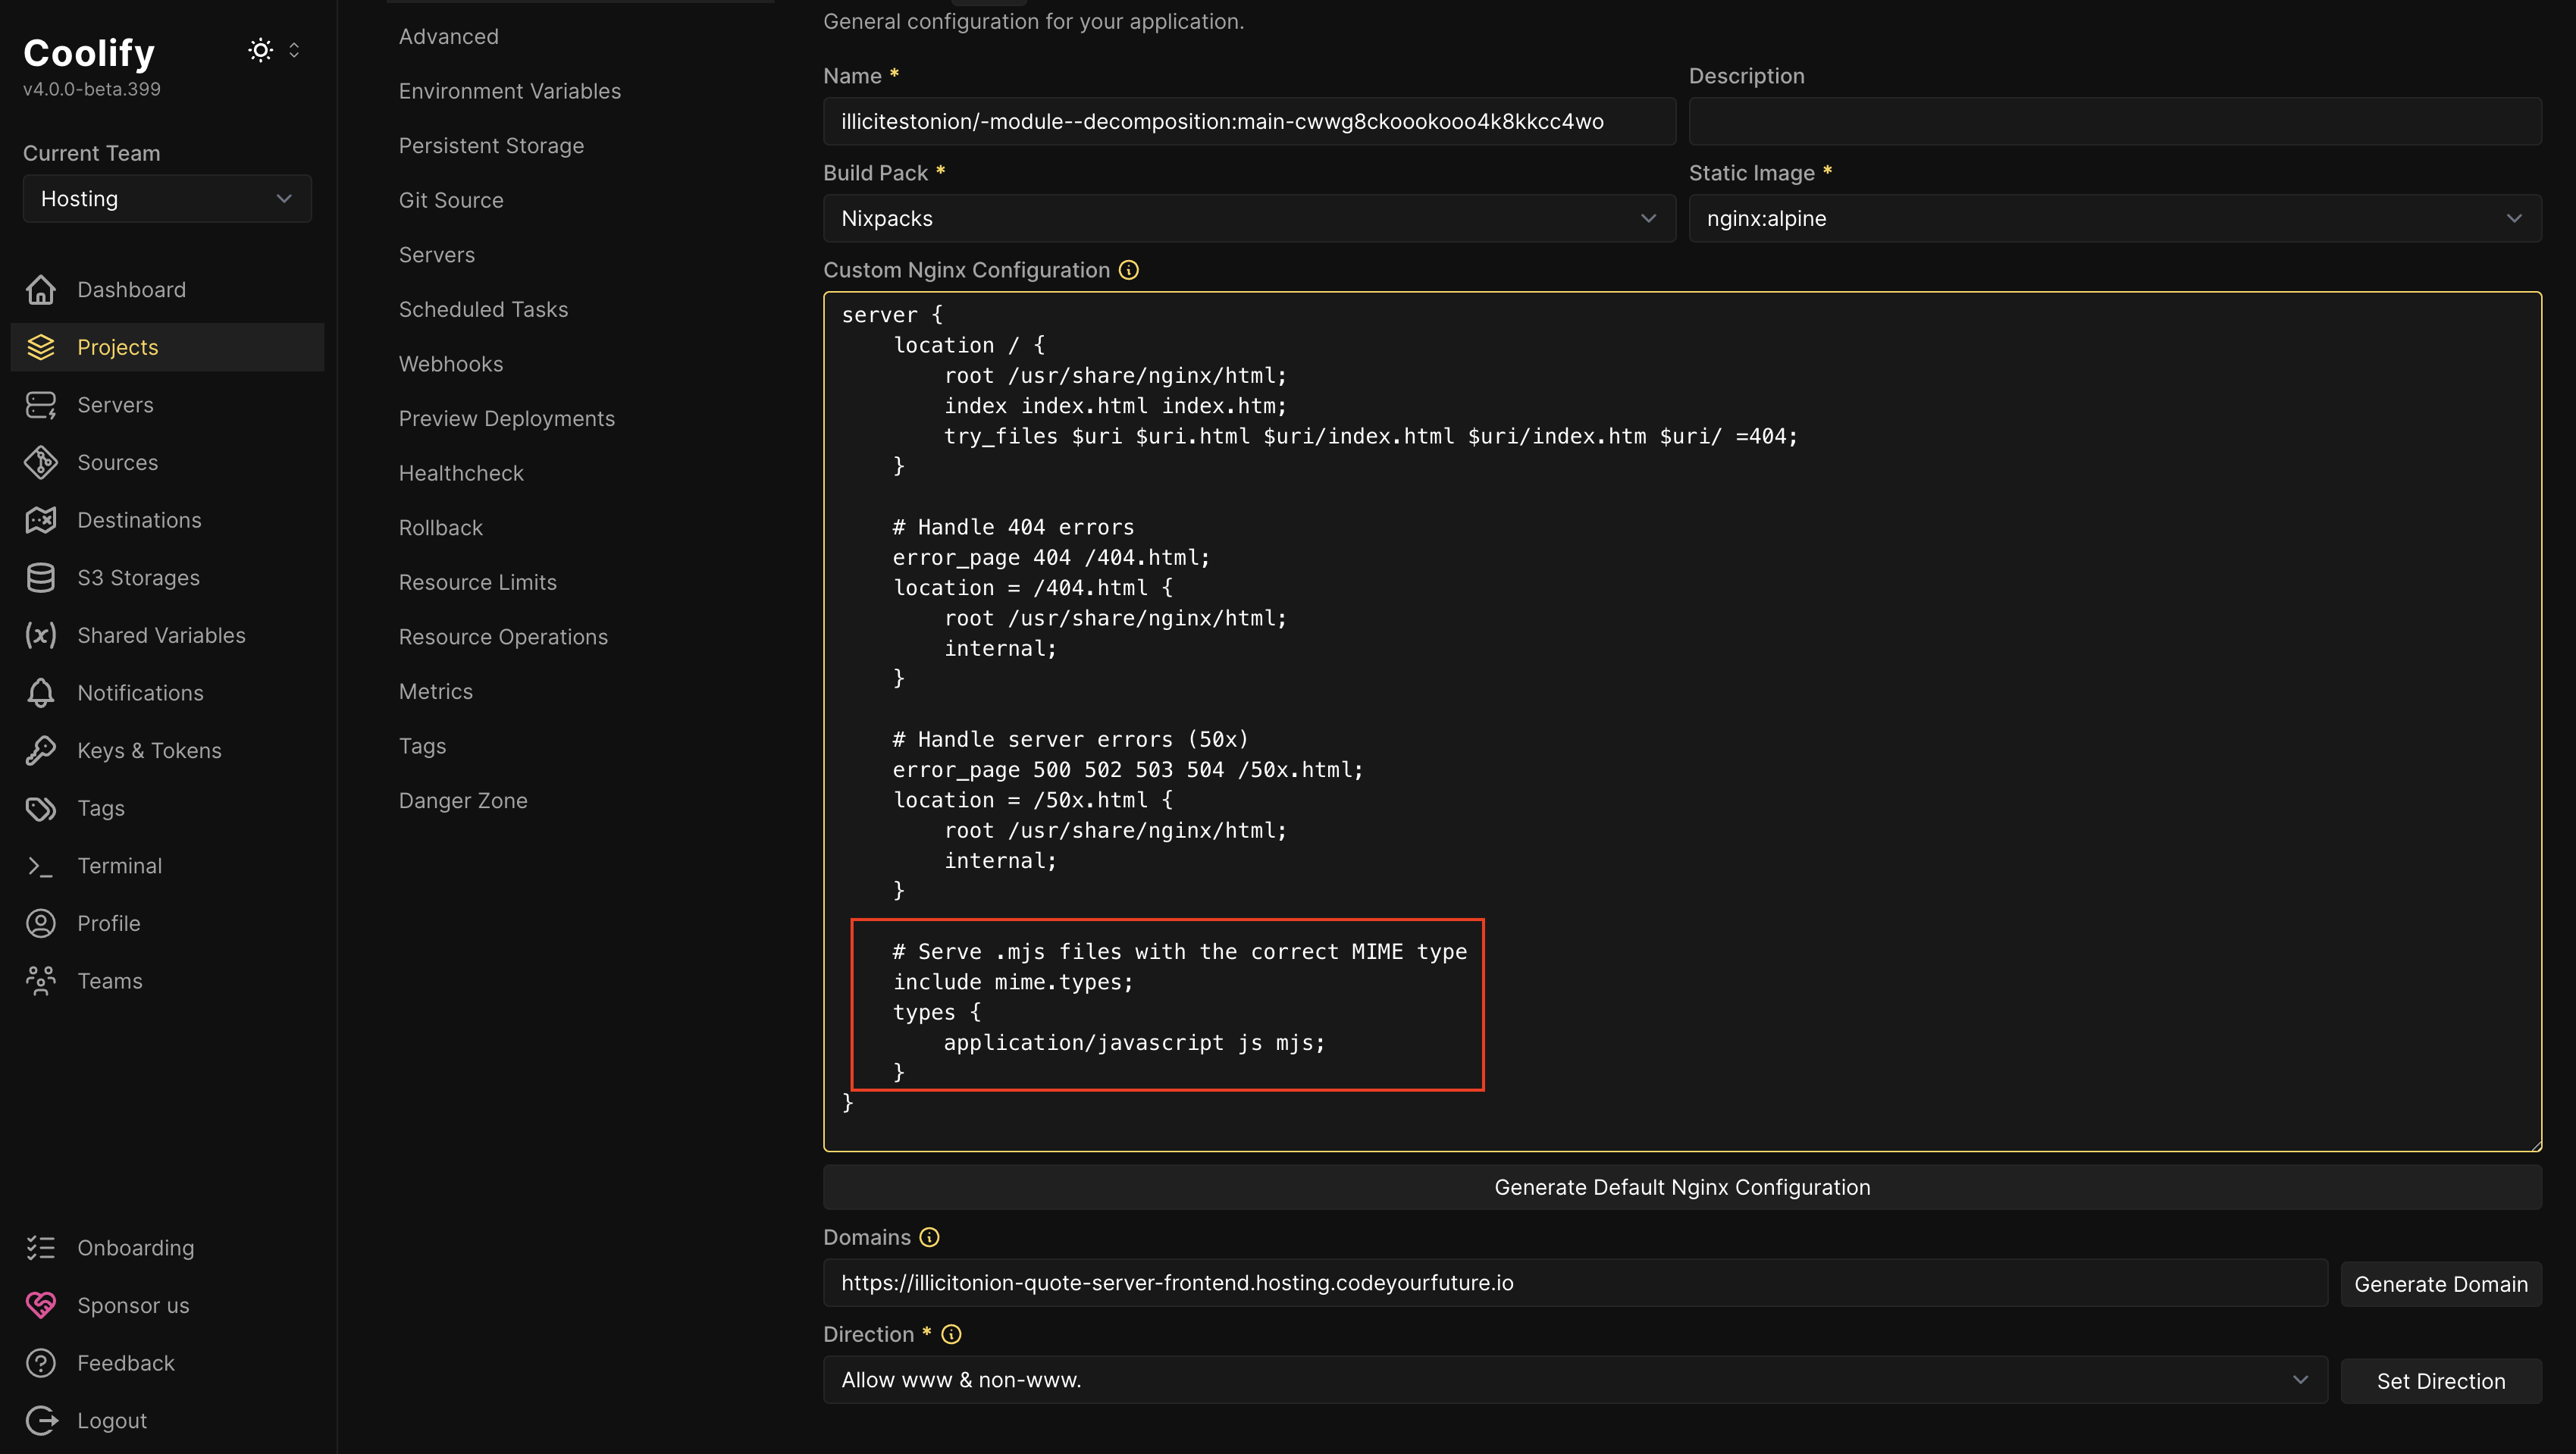
Paste this text before the final } in the generated config:
    # Serve .mjs files with the correct MIME type
    include mime.types;
    types {
        application/javascript js mjs;
    }
Save the configuration, and deploy again.
We hope to make this step unnecessary in the future.